My first project with Blazor
 May 21, 2020 by Yuriy Frankiv (aka InstanceMaster) · 9 min read
Few months ago, I have stumbled upon some article online about Blazor a new web browser based framework from Microsoft. Blazor allows to run applications written in .Net instead of Java Script. Which makes it quite different from "traditional" frameworks like Angular. Blazor runs on web assembly and provides the ability to build rich web applications. I've been working with ASP.NET Core and Angular for quite some time. Despite the fact I'm a big fun of the .NET/Angular combination, there is one thing that always bothers me: you have to keep the same model objects in C# and TypeScript and serialize/deserialize in json to pass from client to server and vice versa. Having client and server running in the same framework potentially saves tremendous amount of work related to client-server interoperability. So, I decided to give it a try.
As my first project I decided to write simple timer tracker. I'm working on multiple things throughout my day. I noticed that I didn't make breaks often enough and sometimes overinvest time in less important things or simply procrastinate a lot. So, this project allows me not only to learn Blazor but also create something useful. There are quite few free to use timers and organizer in the web already. However, sometimes it is OK to re-invent a wheel just in order to learn how to make one. So, I called this application "nocrast" for no pro-crast-ination. I've registered domain nocrast.com for this purpose.
For the scope of this article, the plan is to implement the application with one page that enlists timers. User can create new timers and delete existing ones. User can start and pause times. Everything should be done without page refresh.
Creating a project
Creating a project can be done in multiple ways: using Visual Studio or command line (.Net Core CLI). I decided to go with Visual Studio and created a new "Blazor App" project.

Project name is "NoCrast ".

"Blazor WebAssembly App" provides two projects in one solution: client and server. It creates a shared assembly project for the data structures that will be shared by both sides. Although, it wasn't required to check "Progressive Web Application" for now, it would be great to have this app to run as PWA in the future.

As result, it created a solution with three projects: "NoCrast.Client", "NoCrast.Server" and "NoCrast.Shared".
You can find more details about project creation here. For the purpose of this article we will work mostly with the client project.
Moving from Angular, I immediately noticed a couple of things:
- Once you made any change to the page, you must restart the application. In Angular you run "ng build --watch=true" and simply refresh page. The bright side is that build doesn't take much time and application takes few seconds to start.
- No clear project structure like you usually get with Angular project
- This is my subjective opinion but Razor's approach of using code in ASPX looks little bit messy after Angular.
Since not clear application code structure has been provided, I had to create my own. Classic "three layers" approach requires to separate a model, business logic and user interface (UI) layer. I've started with defining UI first.
Page
Pages/Index.razor has been chosen as the timer's list page. The rest of the pages yet remained unchanged for now. Initial version of this page was very simple and had "Hello, world!" and Blazor survey. The mot important function of this page to update itself every second to reflect timers' changes. I've introduced @code section, declared and initialized a timer that fires every second:
@page "/"

@using System.Timers;

...

@code {
    private System.Timers.Timer timer;

    protected override void OnInitialized()
    {
        SetUpTimer();
    }

    private void SetUpTimer()
    {
        timer = new System.Timers.Timer(1000.0);
        timer.Elapsed += OnTimedEvent;
        timer.AutoReset = true;
        timer.Enabled = true;
    }

    private void OnTimedEvent(Object source, ElapsedEventArgs e)
    {
        StateHasChanged();
    }
}
StateHasChanged() causes the page to re-render.
Now, everything is ready for introducing the model.
Model
Since every timer should represent a task I'm working on, I defined TaskItem model class in Model namespace of "NoCrast.Shared" project. This model class is going to be shared between client and server in the future:
public class TaskItem
{
    public Guid Id { get; set; }
    public string Title { get; set; }
    public bool IsRunning { get; set; }
    public DateTime LastStartTime { get; set; }
    public long ElapsedMilliseconds { get; set; }
}
Moving back to the page. In Index.razor page, I declared list of tasks in @code section:
@code {

    private List<TaskItem> TasksList { get; set; }
...
}
As with regular CS file, you have to declare a package with using in razor page:
@page "/"

@using NoCrast.PWA.Shared.Model;

@using System.Timers;
Alternatively, for often used namespace, you can add using directives in _Imports.razor.
Then, implemented rendering of tasks and timers:
@if (TasksList != null)
{
    <ul class="timer-list">
        @foreach (var item in TasksList)
        {
            <li>
                <div class="alert alert-info timer-item-container">
                    <div class="timer-item-title">
                        <span class="timer-text">
                            <strong>@item.Title</strong>
                        </span>
                    </div>
                </div>
            </li>
        }
    </ul>
}
It is ready for the service now.
Service
Once model is defined, I started implementing middle layer. In NoCrast. Client, I have created "Services" folder and added TimerService class. It will provide a business logic for managing the timers. TimerService implemented logic of adding new timer, removing exiting one and of course starting and stopping functions. In order to avoid a "logic pollution" in this class, all the time calculations have been separated into extension functions TaskItemExtensions.
As you noticed with a timer logic, Blazor page requires to notify it if data has been changed. Event DataHasChanged has been introduced for this purpose. Also, since time calculations are based on the current time, interface ITimeProviderhas been introduced to abstracts DateTime.Now. It allows to unit test service using dependency injection pattern. Here is a final version:
public class TimersService
{
	private List<TaskItem> list = new List<TaskItem>();

	public ITimeProvider Provider { get; }

	public event EventHandler DataHasChanged;

	public TimersService(ITimeProvider provider)
	{
		Provider = provider;
	}

	private void NotifyDataHasChanged()
	{
		if (DataHasChanged != null)
		{
			DataHasChanged(this, new EventArgs());
		}
	}

	public List<TaskItem> GetTasks()
	{
		return list;
	}

	public TaskItem AddNewTask(string title)
	{
		var task = new TaskItem { Title = title };
		list.Add(task);

		NotifyDataHasChanged();

		return task;
	}

	public void RemoveTask(TaskItem item)
	{
		list.Remove(item);

		NotifyDataHasChanged();
	}

	public void StartTask(TaskItem item)
	{
		item.Start(Provider);

		NotifyDataHasChanged();
	}

	public void StopTask(TaskItem item)
	{
		item.Stop(Provider);

		NotifyDataHasChanged();
	}
}
Putting everything together
There two major tasks left to do: instantiate the service and "write" UI with it. Similar to Angular, I used dependency injection pattern for the service and timer provider:
In NoCrast.PWA.Client project, Program.cs:
public static async Task Main(string[] args)
{
	var builder = WebAssemblyHostBuilder.CreateDefault(args);
	builder.RootComponents.Add<App>("app");

	builder.Services.AddSingleton<ITimeProvider, TimeProvider>();
	builder.Services.AddSingleton<TimersService>();

	builder.Services.AddBaseAddressHttpClient();

	await builder.Build().RunAsync();
}
Then get an instance in the Index.razor page:
@using NoCrast.PWA.Shared.Model;
@using NoCrast.PWA.Client.ModelExtensions;
@using NoCrast.PWA.Client.Services;
@using NoCrast.PWA.Client.Utils;

@using System.Timers;

@inject TimersService Service;
@inject ITimeProvider TimeProvider;

...
    protected override void OnInitialized()
    {
        SetUpTimer();

        Service.DataHasChanged += OnDataHasChanged;

        RefreshData();
    }

    private void OnDataHasChanged(Object sender, EventArgs e)
    {
        RefreshData();
    }

    private void RefreshData()
    {
        TasksList = Service.GetTasks();
        StateHasChanged();
    }

    private void OnTimedEvent(Object source, ElapsedEventArgs e)
    {
        StateHasChanged();
    }

    private void AddTimer()
    {
        Service.AddNewTask(Title);
    }

    private void Remove(TaskItem item)
    {
        Service.RemoveTask(item);
    }

    private void Start(TaskItem item)
    {
        Service.StartTask(item);
    }

    private void Stop(TaskItem item)
    {
        Service.StopTask(item);
         }
For new timer creation, input box on top of the list has been added to enter new timer's name.
<input class="new-timer-edit" @bind="Title" type="text" />

<button class="btn btn-primary" @onclick="AddTimer">Add Timer</button>
Here is a final version of the page with UI improvements using bootstrap:
@page "/"

@using NoCrast.PWA.Shared.Model;
@using NoCrast.PWA.Client.ModelExtensions;
@using NoCrast.PWA.Client.Services;
@using NoCrast.PWA.Client.Utils;

@using System.Timers;

@inject TimersService Service;
@inject ITimeProvider TimeProvider;

<input class="new-timer-edit" @bind="Title" type="text" />

<button class="btn btn-primary" @onclick="AddTimer">Add Timer</button>

@if (TasksList != null)
{
    <ul class="timer-list">
        @foreach (var item in TasksList)
        {
            <li>
                <div class="alert alert-info timer-item-container">
                    <div class="timer-item-context">
                        <button class="btn btn-default timer-button" @onclick="@(() => Remove(item))">
                            <span class="oi oi-circle-x" aria-hidden="true"></span>
                        </button>
                    </div>
                    <div class="timer-item-title">
                        <span class="timer-text">
                            <strong>@item.Title</strong>
                        </span>
                    </div>
                    <div class="timer-item-time">
                        <span class="timer-text">@FormatTime(item.GetElapsedTimeSpan(TimeProvider))</span>
                    </div>
                    <div class="timer-item-panel">
                        @if (item.IsRunning)
                        {
                            <button class="btn btn-default timer-button" @onclick="@(() => Stop(item))">
                                <span class="oi oi-media-pause" aria-hidden="true"></span>
                            </button>
                        }
                        else
                        {
                            <button class="btn btn-default timer-button" @onclick="@(() => Start(item))">
                                <span class="oi oi-media-play" aria-hidden="true"></span>
                            </button>
                        }
                    </div>
                </div>
            </li>
        }
    </ul>
}

@code {

    private List<TaskItem> TasksList { get; set; }

    private string Title = "";

    private System.Timers.Timer timer;

    private string FormatTime(TimeSpan time)
    {
        return String.Format("{0:hh}:{0:mm}:{0:ss}", time);
    }

    protected override void OnInitialized()
    {
        SetUpTimer();

        Service.DataHasChanged += OnDataHasChanged;

        RefreshData();
    }

    private void SetUpTimer()
    {
        timer = new System.Timers.Timer(1000.0);
        timer.Elapsed += OnTimedEvent;
        timer.AutoReset = true;
        timer.Enabled = true;
    }

    private void OnDataHasChanged(Object sender, EventArgs e)
    {
        RefreshData();
    }

    private void RefreshData()
    {
        TasksList = Service.GetTasks();
        StateHasChanged();
    }

    private void OnTimedEvent(Object source, ElapsedEventArgs e)
    {
        StateHasChanged();
    }

    private void AddTimer()
    {
        Service.AddNewTask(Title);
    }

    private void Remove(TaskItem item)
    {
        Service.RemoveTask(item);
    }

    private void Start(TaskItem item)
    {
        Service.StartTask(item);
    }

    private void Stop(TaskItem item)
    {
        Service.StopTask(item);
    }

}
Please check the live version out of this in GitHub
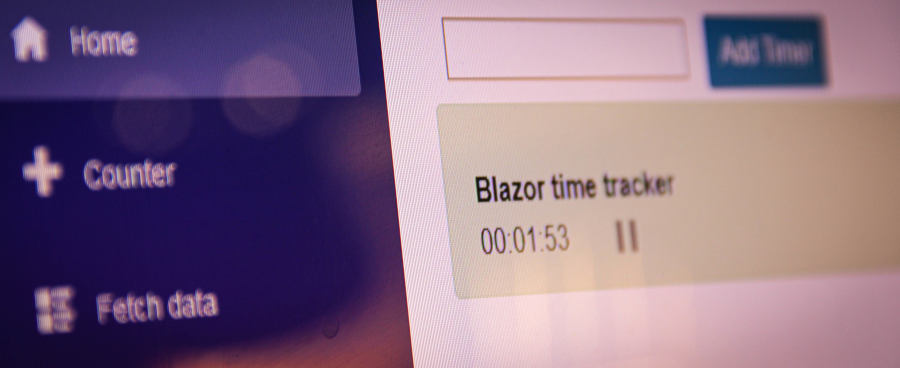
At the end home page should look like this:

If you use the latest Google Chrome or Microsoft Edge then you will notice small + icon on the right side of the URL bar. It indicates that this application can be used as "Progressive Web Application". If you click on that icon you should see a pop-up asking to install this app:

Final result:

Adding unit tests
Like I mentioned above, one of the biggest advantages is using the same programming language and share set of tools for both: client and server. Adding unit tests to the projects as no different from regular project. For now, unit test covers only timer related functionality in the client. Please look at Test folder for more information.
Future
In future, I would like to:
- store my timers in local storage of the browser so they can work offline;
- sync my timers with server and use on multiple devices simultaneously;
- register account and have authentication on the server side;
- create reports;
Above requirements are outside of the scope of this article and subjects of the future articles.
In the next article, I will explain how to call JavaScript runtime and store data in browser's local storage.